
This is a continuation from The Ultimate Hike in Nepal. The Road Less Traveled from Dolpo to Jomsom to Jumla. 22 Days Pure Adventure post.
GUIDE + TRAILS
Do I have to get a guide?
YES! There is no other choice than to hire a guide in order to get through the checkpoints in Dolpo (which yes, we never really went through in October, but you don’t want to be stranded up there and have to return the way you came!).
Even to get out of Jomsom and leave Annapurna, they checked my guide status and Annapurna permit. 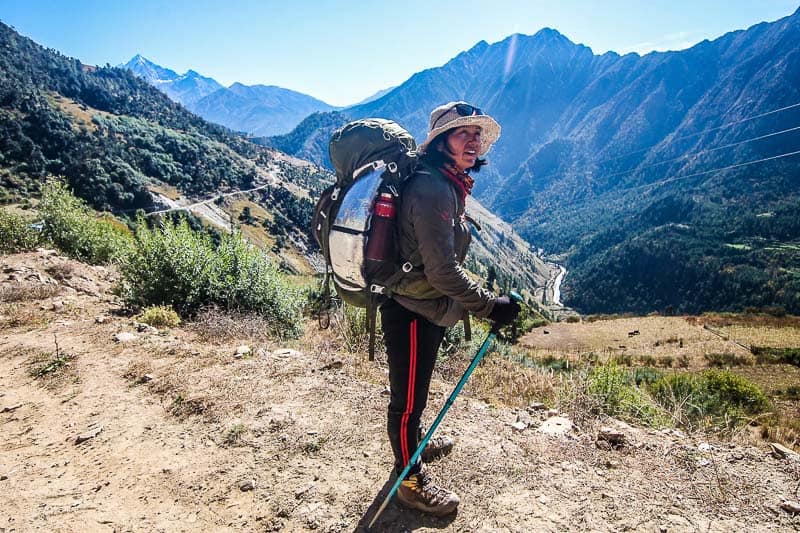
There are independent guides around, but very few will have experience in the Dolpo and Mustang regions, the ones who do generally work for trekking companies out of Kathmandu or the Dolpo region.
While a guide’s lack of expertise in the area may allow for cheaper rates per it also comes at a cost in route security and time lost routing unknown trails.
It is also much cheaper day if you are also carrying all your own gear, which some guides will not allow, and others may struggle as you are looking at 20-30kg on their backs and some guides are not used to being their own porters and cooks.
So, it is a bit difficult, but not impossible to find a guide that is willing to do your trek the way you want it, and you likely need to be in Nepal and searching locally to find what you are looking for.
If you can get an independent guide that knows the area, that’s great, and it is probably worth paying more money for it.
However, you will be hard-pressed to find one if you are starting from the Annapurna region. Your best bet in finding a Dolpo experienced guide is to fly to Juphal or Dunai and start your search there if Kathmandu provides no results.
Are the trails easy to navigate on your own?
Nooooo! Not the entire way. Mule trails are the best you get, and even then, they can disappear at critical points.
This wouldn’t be such a big deal if you knew you would see people who could steer you back onto the right course when you are uncertain, or you knew you’d find secure camping areas, but as we learned, people don’t always appear on the trail when you need to make a critical decision, and not all-terrain will allow you to camp. 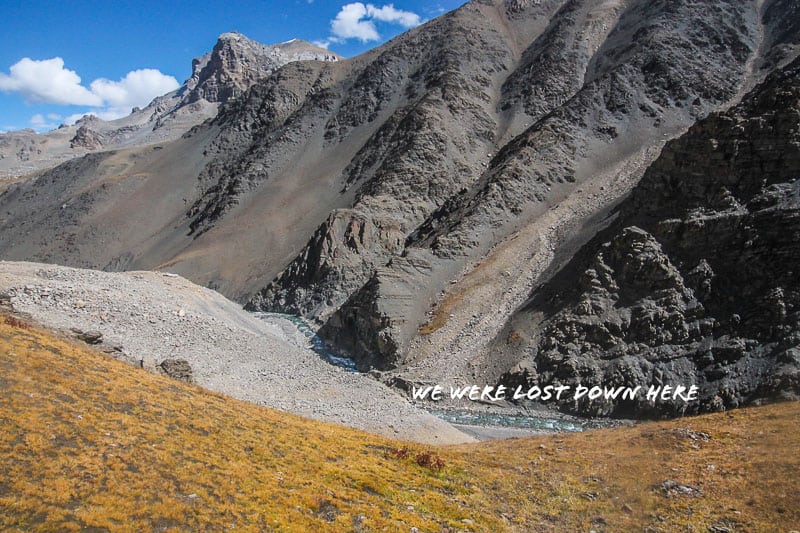
The problem is often that you are not sure which places you need to push past and which ones will give you a decent place to stay for the night and you definitely do not want to get stuck trying to complete a pass later in the day as it is long, steep and slow going.
Both locals and guide itineraries online cannot give you accurate estimates of distance and time if you are carrying all your own gear.
Knowing what I knew now I would say there were particular points of difficult to navigate the trail, but much of our doubt came from a lack of information or from inaccurate information, and most of our problems we created ourselves.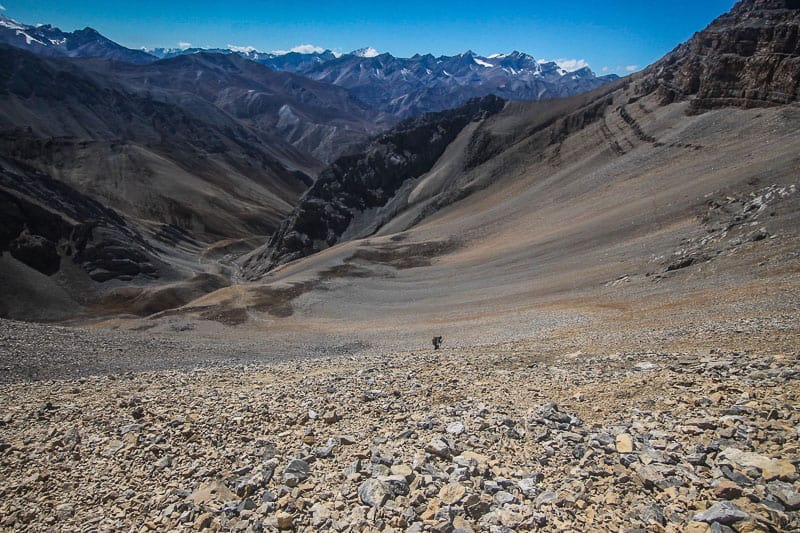
Do you see other hikers along the way?
Not necessarily, though we did on occasion, you will likely encounter locals every couple days or so if not more. There were several days in total at the end of our trip, where we did not see other people.
We were actually very lucky to have encountered the number of people we did when we did along the way but only once were the people actually headed in the same direction as us.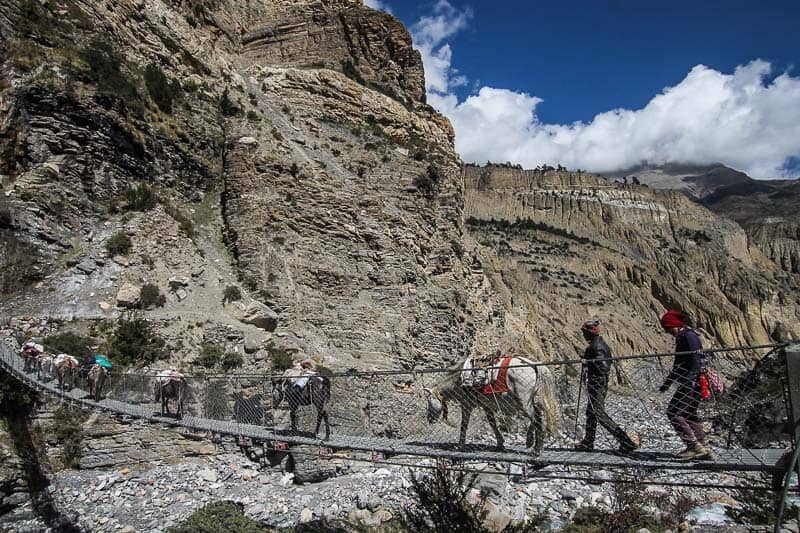
We met a total of 5 trekking pairs (or solo trekkers) along the way – none of whom were carrying their own gear, none of whom had a guide unfamiliar with the area and only one of whom was going the same direction as us, so it can be a bit limiting and a native Nepali speaker is absolutely essential (if they speak the local Tibetan language even better!).
You will hit two main villages in Dolpo – Do Tarap and Charkabhot. If you take our route, you will also land in Phalyak, Sangta, Ringmo and Tibirikot where you can get food, and there is very limiting lodging, but we were offered it nonetheless in all of the above places.
What navigational tools should I bring?
My friend’s GPS watch did not work as we began our trip and it was something that probably would have saved us from a couple wrong turns and worries about whether we were heading in the right direction.
A map is absolutely necessary but avoid the 1:170 000 if you can. (I’ve shown it here but there is a better map. Get a 1:25 000 if you can. 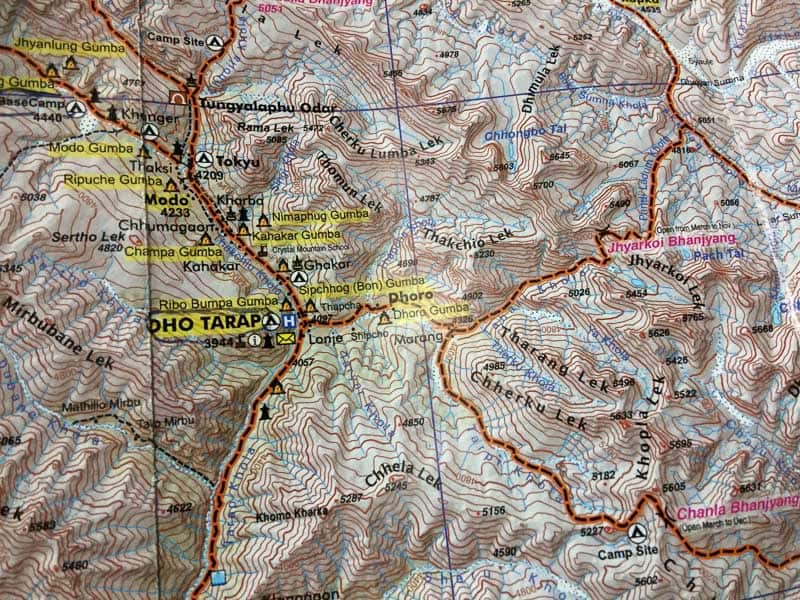
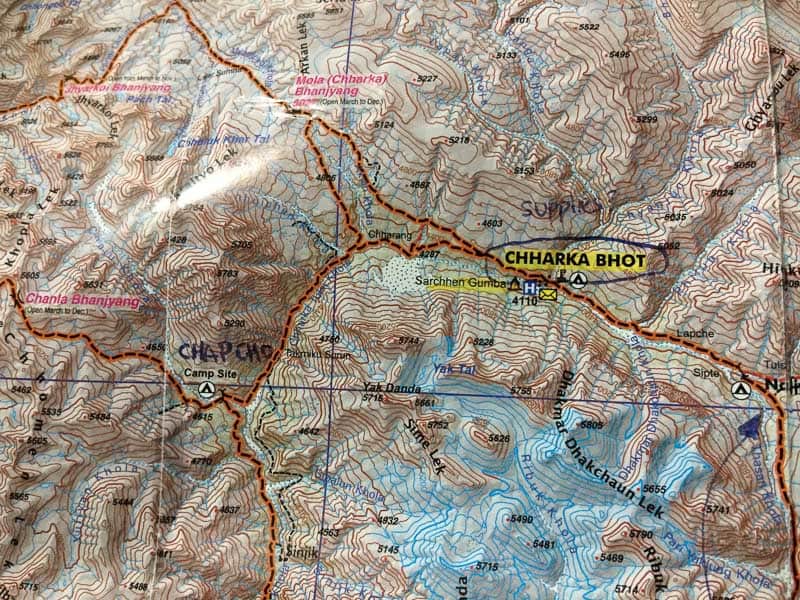
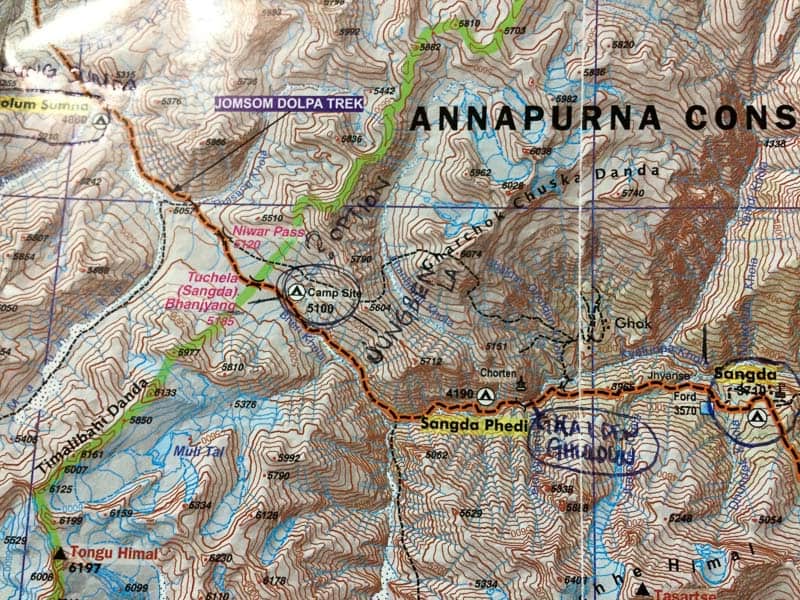
You might then need to buy one for Dolpo and one for Jumla to cover the full trek, but it is far more accurate).
For various routes and stopovers check out ROUTE OPTIONS below, and I suggest looking at a few online itineraries at the various places they select to camp (they often have a local name and then a different name on the map, so it is good to have a few different references when it is time to ask the locals; BUT remember: the online itineraries won’t give you an accurate idea about trekking times if you are carrying your own gear.
It will, however, give you an idea about where camping is available in case you have to make some last-minute changes or hiking decisions.
How do I access food and water?
I had a 3L filtered bladder and a steripen that I used to fill my 3L camel pack bladder. However, the steripen did not work well and rarely stayed lit long enough to rid the water of any viruses it might contain.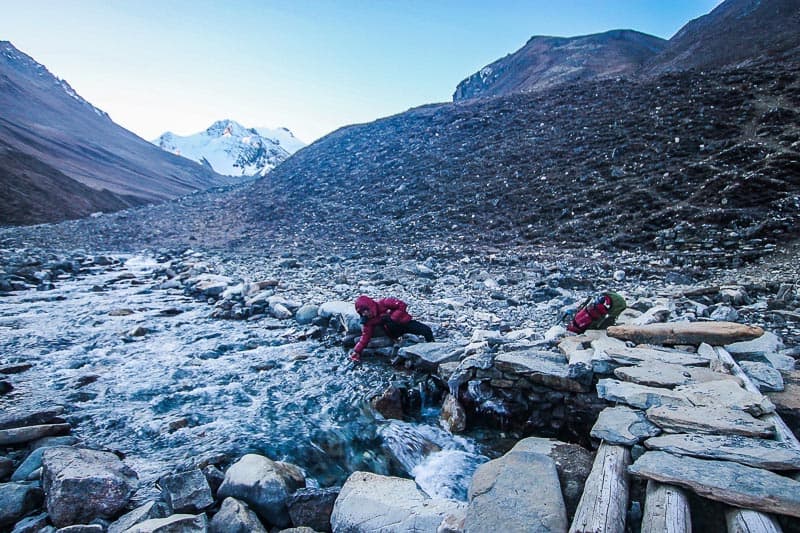
When my filtered bladder finally stopped working (after three months of constant use), I just switched to dropping iodine tablets in my camelback as a backup, and that worked just fine.
What I would have found additionally very helpful is the one-litre collapsible water bottles with the filter attached (Katadyn “BeFree”). It is light and easily accessible.
The campsites on the maps have water sources, but there was an occasion or two where we didn’t have a water source; better planning and bringing it up each time you talk to a local will help solve the problems we had on those occasions.
To know what food we bought for 25 days of hiking and the general price, see FOOD + ACCOMMODATION and GENERAL COSTS.
In addition, meals and supplies can be purchased in Jomsom, Kagbeni, Dunai, Juphal and Jumla. Meals and a few additional food items such as boiled eggs, chowchow noodles and sometimes cookies can be found in Phalyak, Charkabhot, Do Tarap, Ringmo, Tibirikot and Kagbeni.
Hot meals can be bought in all of the above places as well as Sangta, and the majority of villages after Phoksundo on route to Jumla.
Does going independently take away from the local economy in Nepal?
If you ask a guiding company, they will say yes because it takes away from them directly but in the bigger picture, the economy itself, you are still purchasing your permits, and purchasing gear, food and accommodation.
You can even hire a Porter without hiring a guide which will also increase how much you contribute to the economy. Where you save in one area, you spend in another for the most part, so it usually evens out.
A guest house, for example, will lose out on your business if you stay in a tent and make your own meals, but the store you bought your tent or your food from and the place you bought your stove and the gas to run the stove from, will benefit where they otherwise wouldn’t have.
There are a lot of different ways and varying degrees you can contribute to the local economy, and it all depends on how you want to invest your money in Nepal.
If you’ve found a guiding company wherein your money goes further to support empowerment and community outreach programs through their guides, then, by all means, get a guide from that company and support a good cause.
If you need peace of mind by hiring someone who has done the trail before, can navigate and negotiate the guest’s houses easily and whose company will take responsibility for your success and safety, then choose to take a guide.
If the value of your trip comes from self-sufficiency, isolation, and the authenticity of adventure then feel free to find an independent guide to sort out a route and plan with you, there are many other ways to still support the economy in Nepal and you might find along the way that you need to hire services locally, such a mule from one section of the trip to another.
NOTE: during harvest days which vary throughout the months of October, mules may not be available because they are being used and men may not be able to work as porters during this time as well if you decide on the one-half way through your trip.
Permits for trekking in Nepal.
STEP 1: Know the costs, the information and the process
YOU WILL NEED TWO TREKKING PERMITS + 1 TIMS CARD FOR ANNAPURNA.
- Annapurna trekking permit for Jomsom to Kagbeni
- Annapurna TIMS card (BLUE because you have a guide for your trek)
- Dolpo trekking permit for Kagbeni to Kaigon (the Dolpo region) – this can only be obtained in Kathmandu or Pokhara
NOTE: Your TIMS card and permits only work as a one-time entry to the park which means that each time you exit the park and start a new trek, you have to get a new TIMS card and a new permit.
So your permit from a different trek in Annapurna that you did a week before will not work for your new trek because you left the national park.
YOU CAN ONLY GET YOUR DOLPO PERMIT APPROVED IN TWO PLACES IN NEPAL:
- Kathmandu
- Pokhara
In Kathmandu, they will have a much broader range of companies and guides, and they are also far more knowledgeable about the process of obtaining a permit for Dolpo.
If you are planning to take an independent guide who hasn’t been to the Dolpo area, they will not know the intricacies of obtaining permits for the area and may assume it is as easy as Everest or Annapurna regions which it is not.
Do not let them convince you that it is easy to obtain one – they do not have any restrictions on the places they visit as Nepali born and therefore do not have to go through the permit process that foreigners do, but also, they often just do not know that there is such a complex permit process for the area.
If you are planning on taking an independent guide who hasn’t been to the area, see below what we had to do to ensure our permits came through in the end.
- UPPER DOLPO + UPPER MUSTANG ARE NOT THE SAME FEES LOWER DOLPO + LOWER MUSTANG
See below
- THE STEPS TO TAKE + COST OF PERMIT WILL BE DIFFERENT FOR THOSE WHO TAKE A COMPANY GUIDE VS. INDEPENDENT GUIDE and for those who trek in a pair or group versus solo trekkers. (It gets much more complex for solo trekkers, so please read on).
See below
- SOLO TREKKERS MUST PROVIDE THE PASSPORT AND TWO PASSPORT PHOTOS OF ANOTHER PERSON THAT WILL BE “GOING ON THE TREK WITH THEM” IN ADDITION TO THEIR OWN (This other person that you are “proving is going with you” will obviously not actually be joining you; you just need to have the paperwork showing that they are). Their documents are in addition to your own passport and two passport photos proving that you are one of the two foreigners going on the trek with a Nepali guide.
WITHOUT PROOF OF TWO FOREIGNER TREKKING DOLPO WITH A GUIDE, A PERMIT WILL NOT BE GRANTED.
Many people get sick before or in the first couple days of the trip, and their partners have to go on without them solo, so it is common to tell the authorities at the checkpoints that your travelling partner had to go homesick. You will, however, have his/her permit with your own to show them.
This is a difficult task to plan around if you don’t know anyone who will come with you to the Permit Office with their passport and two photos, or who will give them up to the person arranging your permits while they go to the office to get the permits.
It is nerve-racking giving away your passport to someone, especially a stranger. However, I was not in a position where I had another option, and it luckily worked out in my favour because I trusted my trekking partner’s connections.
If, however, you have the opportunity to go with the person to the Permit Office it will definitely mitigate some of your concerns, and you will leave with the permits in your hand for safekeeping before you begin your trek which will give you peace of mind.
Step 2: Ready the cost/payments based on your circumstances
- For GROUPS OF 2 OR MORE FOREIGN PEOPLE WITH A COMPANY GUIDE
Lower Dolpo will cost you:
$10 USD/week/person x2 for the TWO WEEKS it will take you to get through the Dolpo region
TOTAL: $20 USD/week/person
Upper Dolpo will cost you:
$500 USD/10 days/person and $50 for every additional day after 10 days.
TOTAL: $700 USD per person for 14 days.
- FOR GROUPS OF 2 OR MORE FOREIGN PEOPLE WITH AN INDEPENDENT GUIDE
Lower Dolpo will cost you:
$10 USD/week/person x2 for the TWO WEEKS it will take you to get through the Dolpo region =
$20 USD AND around $90 USD for a company to take on the insurance risk of you going without a company. The office will NOT issue you a permit if there is no trekking company assuming the risk for the trekkers going. We paid an ADDITIONAL $10 USD for a man to arrange our permits (and he took care of finding the company to assume our risk as independent trekkers).
TOTAL: $20 USD each plus the group split cost of $100 USD
Upper Dolpo will cost you:
$700 USD per person for 14 days AND around $90 USD for a company to take on the insurance risk of you going without a company.
The office will NOT issue you a permit if there is no trekking company assuming the risk for the trekkers going. We paid an additional $10 USD for a man to arrange our permits (and he took care of finding the company to assume our risk as independent trekkers).
TOTAL: $700 per person plus the group split costs of the additional $100 USD
- FOR PARTIES OF ONLY 1 FOREIGN PERSON WITH AN INDEPENDENT GUIDE
Lower Dolpo will cost you:
$10 USD/week/person (x2 weeks) TIMES 2 AS YOU HAVE TO PAY FOR THE SECOND PERSON even though there isn’t one. Therefore, you will pay $40 USD for the permits. (It gets harder as you have to PROVE a second foreigner is coming with you, see more below). You also will pay around $90 USD for a company to take on the insurance risk of you going without a company.
The office will NOT issue you a permit if there is no company assuming the risk for the trekkers going. We paid an additional $10 USD for a man to arrange our permits (and he took care of finding the company to assume our risk as independent trekkers).
TOTAL: $140 USD (this will include having secured a second permit for your “trekking partner so long as you supplied the necessary documents – passport photocopy will not be acceptable)
Upper Dolpo will cost you:
$700 USD per person for 14 days AND around $90 USD for a company to take on the insurance risk of you going without a company. The office will NOT issue you a permit if there is no trekking company assuming the risk for the trekkers going. We paid an additional $10 USD for a man to arrange our permits (and he took care of finding the company to assume our risk as independent trekkers).
TOTAL: $800 USD per solo trekker
Step 3: Get to the permit office with your “permit guy.”
When To Get The Permits
DO NOT GO ON A SATURDAY. Saturday’s in Nepal is their day of rest, and sometimes the office is open, and sometimes it isn’t, or sometimes the TIMS counter is open, and the other permit counter is not, so it is best to avoid Saturdays. Also, look up Nepali holidays in advance as there are many and they can mess up your permit plans.
September and October are particularly difficult months to navigate as there are many holidays and celebrations during those months. Ask around to the locals before walking all the way out there to find it closed. Try to get your permit in advance in case of any delays so that it does not affect your desired start date.
I got my people started on our Dolpo permits a week in advance, and it still ended up in a disaster. You have to micromanage this aspect and insist that they keep you included in the process and details they uncover along the way so that you walk away with the permits in your hand before you leave.
Where To Get The Permits?
At the Tourism Information Center IN KATHMANDU
Kathmandu Permits and TIMS can be purchased in the Nepal Tourism Board Office on Pradarshani Marg, Kathmandu (Tel: +977 1 4256909). *If you book with a trekking agency, they will arrange these for you. Directions here will depend on where in the city you are coming from. Guesthouses and hotels can tell you about bus routes to get there, the cost of taxis, distance, walking times etc.
At the Tourism Information Center IN POKHARA
First, you need to get your TIMS card in which they will give you a form to fill out (that will request travel insurance information), and they will use one of your two passport photos. Once you have your TIMS card for Annapurna trekking (Jomsom is part of the Annapurna region), you can then move to the room next door where you will fill out the Annapurna Conservation Area Permit (ACAP), provide your passport and two passport photos, and you will walk out of there ready to start your trek.
Directions to the Tourism Information Center IN POKHARA:
The permit office building is 1.5 km from Lakeside. Walk past the police information centre towards the tourist bus station. From Pokhara Center, take a right just after the police station and head down that road taking your first left. A couple of minutes down that road, you will see the signs indicating the permits and immigration building. I came from the Juicery (about as far away as you can get in Lakeside and it was a 40-minute walk).
Route Options
YOU HAVE TWO INITIAL DIRECTIONS OF TREKKING:
Leave from Jumla, Rara, Juphal or Dunai (easier choice)
Leave from Annapurna routes or Jomsom (more complicated)
So why didn’t I take the easy route? Three reasons. Firstly, we wanted to end in my friend’s village near Jumla, so we had some time with her family. Secondly, I had a documentary scheduled in the Mugu district (Rara Lake) four days walk away from Jumla, so it made the most sense to trek directly to there.
Thirdly, it takes two flights to get to any of the destinations listed in A. All flights have to go to Nepalgunj first and then a second flight will take you to airports in any of the above towns. This is FOUR FLIGHTS total by the time you arrive back to Kathmandu or Pokhara.
- YOUR CHOICES OF PLACES TO STAY/CAMP ALONG THE WAY CAN VARY
I will post the photo of our original route, and I will make notes as to what worked and what didn’t and what alternatives exist the best I can without having tried all of them.
- A. The bus ride from Pokhara to Jomsom was uncomfortable and bumpy but magnificent (flights are an option here).
- Alternative Routes can be taken from Kathmandu to Jomsom (flights are an option here) or C. You can add additional treks on from the Annapurna region such as Poon Hill or a chunk of the Annapurna Circuit trail that lands in Jomsom.
- We did make it from Jomsom to Kagbeni with no issues (both times); however, there are a couple of options here as well.
- A. Jomsom to Kagbeni is a short day, but it gets you closer to Yak Kharka which is in turn, is a shorter trekking distance to Sangta (than Phalyak).
- Or you can bypass an extra day going to Kagbeni by stopping short of it and cutting up to Phalyak instead. This will mean a longer day (10-12 hours) getting to Sangta if you’re carrying all your own gear, but it is a road all the way there so you can’t get lost (and you may even get a tractor to pick up if you’re lucky!). It is a beautiful view of the whole way to Sangta.
- A. From Sangta you can get to Ghalden Ghulden which stops at the beginning of the long and high Jungben La pass (the local name is different) or
- You can continue on for a longer day through the pass arriving at Khola Kharka on the other side of the Jungben La pass – you can see it as you come down the other side of the pass and it puts you at the foot of the Niwa pass for the next morning.
- If you are overly ambitious, you can attempt both passes on the same day and find someplace to camp on the other side of Niwa pass, but after doing both passes, I wouldn’t recommend it
- From Yak Kharka you get to Ghalden Ghulden – I think (but don’t know from experience) that Khola Kharka would be a bit of a stretch (from the Yak Kharka outside of Kagbeni), but you could give it a try if you were feeling up for it.
- A. From Ghalden Ghulden you’ll have an early shot at the pass and would be able to conquer both Jungben La Pass and Niwa Pass in one day if you felt up for it, camping at a nice spot along the gentle river before Nolum Sumna (Yak Kharka #2)
- You can do the same as A. but push all the way to the campsite at Nolum Sumna (this seems like a great place to start from the following day for the river crossing to the trail on the other side)
- From Khola Kharka you can do the Niwa pass early in the morning and have an easy rest of your morning getting to Nolum Sumna or
- You can continue past Nolum Sumna to Norbulung campsite which has no infrastructure but is a pleasant spot to camp and is only 2 hours further from Norbulung (with heavy packs on) if you have the time (it is an enjoyable walk there along the river)
****DO NOT PUSH PAST NORBULUNG TO NALIYANG SUMNA IF IT IS LATER THAN 2:00 PM
****YOU MUST CROSS THE RIVER NEAR NORBULUNG TO FIND THE NEW TRAIL ON THE OTHER SIDE OF THE RIVER – THE OLD TRAIL WILL DISAPPEAR AT DANGEROUS RIVER CROSSING
***I cannot tell you where the river crossing is as we missed it and had to cross at a very sketchy area past Norbulung Campsite
- If you do both Jungben La Pass and Niwa Pass on the same day, you will have an easy hike to Nolum Sumna or to Norbulung. Again, it is at least four hours to the next campsite, and I missed sections of the trail being lost. There may be a decent place or two to camp a couple of hours past Norbulung (after you cross the river), but I can’t recall if they had a water source or not. Best not to risk it, especially if you’re searching as it reaches evening.
- A. Starting from Norbulung (Yak Kharka #2) you can make it to Naliyang Campsite (I believe it is somewhere down near the big suspension bridge that is in between two high hills. This will be an easier day so long as you found the trail on the other side of the river – or
- You can continue the 3 ish hours from Naliyang Campsite to Charkabhot for a longer day.
- C. Starting from Norbulung Campsite, you will have a full but doable day of hiking straight to Charkabhot (don’t forget to cross the river first to get on the high side of the river – the trail will continue up, and you’ll eventually be high up over the river on a fairly obvious mule trail.)
- Starting from Naliyang campsite, you’ll have an easy day from there to Charkabhot and be in early enough to explore and very interesting and charming village.
- From Charkabhot (hopefully you’ve rested up a bit!) there are two routes you can take to get to the next village of Dho Tarap, and we took the “road less travelled” by accident, and it was a big mistake for us (a fun one that we survived though). There is,
- A. The Upper route to Dho Tarap in which you go through the first of two passes Mola (Charka Pass) Banjyang Pass @ 5027m (Jhyarkoi Banjyang (height unknown ~5200m) the following day.
As much as two passes don’t sound enjoyable (and our map showed no campsite for this upper route) – the trail is much more commonly used by locals in which you will likely see people if you need to ask better directions along the way and there are definitely campsites along the way. We started on the lower trail and then got lost, ended up going through the wrong pass and ended up on the upper trail at a campsite there (maybe Lar Sumna on the map) that would lead us to Jhyarkoi Banjyang Pass to get to Dho Tarap. - The lower trail. You will constantly question yourself along this trail; you will likely not see other people, not even locals. It is very likely that the trail will lead you astray and you will end up in a village below the route you intended to take (Dhaogoan). We had a stroke of luck and a local who pointed us on the right track to Chhapchu campsite, but we proceeded to get lost the following day because there was one clearly defined trail that led along the river (and only one trail on our map) and there was a trail that we found
- A. From the upper trail wherever you camp you will need to aim for Jhyarkoi Banjyang Pass which will lead you into Dho Tarap. The pass took us about an hour and a half, but we were quite exhausted from the pass the day before, ice had formed all over the inside of our tent from the altitude creating a poor sleep, and the altitude had caused headaches and nausea for both of us. With a bit better gear and more peace of mind, it would have been on the easier side for us in terms of passes. The way down was long and steep into the valley bottom, which we followed the rest of the way to Dho Tarap.
- B. From the lower trail, you will leave Chhapchu (again, without a local to help you find the trails, I don’t recommend this route) and instead of following the obvious trail along the creek going Northwest, (which will take you through a pass to the upper trail), you need to take a trail that looks less distinguished West-Northwest to Chanla Bhanjyang Pass (5382m) which will lead you to the village of Dho Tarap.
- A. From Dho Tarap you can stay in the village of Tokyu which is only a couple hours walk from Dho.
- From Dho, you can head further to Numa La camp, which is past Tokyu an hour and at the bottom of what will be an uphill climb to the bottom of Numa La Pass (. ).
- From Dho you can push beyond Numa La Camp (4440m) for Numa La High Camp which is halfway up the uphill leading to the foot of Numa La pass. It is the only flat spot around that area.
- D. If you miss Numa La High Camp (it doesn’t look like much), you can snag a bumpy slightly tilted spot just around the corner several hundred feet from the foot of Numa La Pass. There is a creek the right at the foot of the pass for water but beware of it freezing over. It’s best to fill up when you arrive than waiting for morning. (can see this part of the hike in Lonely Planet Nepal Trekking – the instructions to Phoksundo is quite accurate)
- A. After Numa La Pass your next campsite will be Daniger (aka Pelung Tang).
- B. If you leave very early and are hiking fast you may arrive in Daniger before noon and could, if you really wanted to push it, consider doing Baga La Pass (5269m) and find a place to camp after the pass as there are several nice spots (including the high camp that trekkers use coming from the other side of the pass).
- A. Whether you leave from Daniger (10 hours) or
- B. from somewhere past Baga La Pass, (eight hours or less) you will arrive in Phoksundo that day, and you can stay in the village of RingMo or camp at Phoksundo Lake.
The routes from Phoksundo to Jumla or further onto Rara Lake are well used, well-mapped and well-written about in which you will be able to set your own course and find plenty of villages along the way based on how your feeling that day and how far you want to get. There is also a route from Juphal to Jumla in the Lonely Planet: Nepal Trekking Guide.
Getting There
BY PLANE: (Flights are around $150-200)
Jomsom (direct from Pokhara).
Juphal or Dunai (flight to Nepalgunj then direct flight).
Jumla (flight to Nepalgunj then direct flight).
Mugu/Rara Lake (flight to Nepalgunj then direct flight)
BY BUS: (Bus tickets vary based on where to and how many buses you will need)
Jomsom (direct from Pokhara)
Juphal (bus to Nepalgunj, then bus to Juphal) – Same for Dunai and Jumla and Mugu
PRIVATE JEEP: (this will have to be negotiated once you arrive)
This can get you anywhere if you are willing to pay for it. Jeeps sometimes can’t get past certain obstacles along the way, and you end up switching from jeep to jeep until you get there, but if you’ve got a big enough group, it might be worth it.
Basic Packing List
It is cold and dry and leading right into winter so both the days and the nights can be chilly. However, there is often a ton of sunshine in Dolpo during the day, which can be warming as you hike.
You will want sleeping clothes separate from hiking clothes, so you always have something warm to change into. A basic packing list can be found below: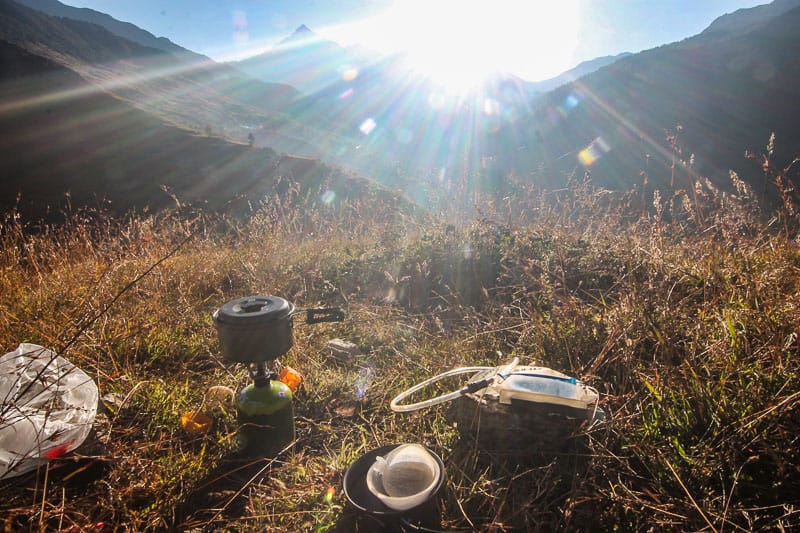
Click here to read a complete packing list for The house Treks in Nepal.
2 T-shirts/tanktops (breathable is best)
2 warm long-sleeve shirts (one for sleeping, one for hiking)
2 pair of hiking socks
3 pair of compression socks (for inside hiking socks – they are also excellent at keeping leeches out)
1 warm pair socks for the night
1 rain jacket or poncho
1 warm down Jacket for night
2-3 Buffs to use as a scarf, eye cover, bandana, toque etc.
1 pair hiking pants (quick dry is best)
1 pair Long Johns/sleeping pants
1 pair of hiking boots
1 pair flip flops
Basic Toiletries: toothbrush, toothpaste, hand sanitizer, Ibuprofen, etc.
Headlamp or flashlight
Blister Kit, Leatherman/knife, basic first aid kit etc.
Antibiotics + rehydration salts (severe diarrhoea or other emergencies)
Sleeping Bag (-5 or -10 minimum though you can survive with less)
Backpack Rain Cover (try lining the inside of your backpack with a garbage bag)
Phone jacks, extra Camera batteries (in case of cold weather), cords etc.
Mini Solar panel (this was extremely useful along the way)
Ziplock Bags (many)
Sunglasses
Rope
Spoon/fork
Camp stove + gas + pots/pans
2-3 Lighters
2-3 tubes of shoe repair glue
1 tent ( one took the poles/pegs etc. the other carried the material)
NOTE: We took two tall gas cans and only ended up using one, but we used it sparingly. 3 small ones should do the trick as well.
General Costs Along the hike
NOTE: I was one person paying all the costs for myself and my guide – if you have more people, the cost will be split amongst; however, many people there are and will be lower.
GEAR (see ADVENTURE GEAR) – $85
FOOD (Grocery Store) – $150-200
FOOD (On Route) – $35
MEALS (On Route) -$175
ACCOMMODATION – $75
TRANSPORTATION – $75
GUIDE – $375
TOTAL: $1020 USD
Accommodation:
Guesthouse Stops (very basic):
Jomsom – Kagbeni – Phalyak (ask around) – Sangta – Charkabhot – Dho Tarap – Ringmo – Chhepka – Dunai/Juphal/Tibirikot – most villages after this point will have some kind of lodging and food available (but not necessarily camping supplies).
Food: For Two People
50 Ziplock Bags of Muesli (I added oatmeal in, goji berries, dried apples, various nuts, chocolate, and a scoop of peanut butter – protein powder would be a great thing to add if you have it)
50 packets of tea (Ziplock of sugar cubes for muesli or tea)
1 Big Tub of Peanut butter (or 3 small ones) – it was worth the weight to have some protein
6 boxes of granola bars
4 bags of dried chickpeas
1 bag of moon daal
20 small Ziplock bags of various nuts and dark chocolate
6 KitKat and 4 snickers (save them for the lower altitudes when you are ravenous)
8 bags of dried apples
6 Dried soup packets (we ended up combining these with chowchow noodles)
16 Chowchow noodles
1 Bag pasta
1 package of papads (these were the best toasted with our soup and chowchow, and we wished I’d bought 2 packs)
2 packets of cookies/crackers
10 fresh apples (bought in Jomsom which lasted us the first five days and the dried apples for later)
TOTAL: $150-$200
NOTE: We picked up fresh eggs that we boiled from villages along the way and usually bought a dozen at a time not knowing how long it would be before we’d see another village. It is cold enough in the night to keep them cool, and they last a week.
NOTE: If you are coming from the west and can bring dried mango and dried kiwi, they are great fuel along the way – also bring the Ener-C or Emergen-C vitamin and rehydration packets as they add important nutrients. Power bars would also be worthwhile, and wraps would have been an easy way to get the peanut butter down. My list is made up of what I was able to access in Pokhara, so I was limited in a lot of ways with food and gear)
The trek does not have the groundwork necessary for amenities such as hot (gas) showers, outlets and sometimes even electricity, in many of the guesthouses, so prepare accordingly. (I bought a charged jack for my phone to charge it along the way and charged it with my solar panel each day). Bathrooms are either outhouses or squat toilets separate from your rooms.
The price of our guesthouses along the way depended on, the quality of the lodge we stayed in, the number of rooms available, how far along the trail we were and how many meals we would be purchasing from the owners. Our accommodation ranged from 300-1000/night for the two of us.
The rooms are basic, they can offer a bed and a blanket which will keep you warm enough to catch a bit of shut-eye, but it was necessary to use it with your own sleeping bag as the temperature drops at night and gets colder as you move higher. They may be able to provide extra blankets.
Our most comfortable guesthouse was in Dho Tarap at a newly renovated place called Star Mountain Hotel and Grocery.
Safety
The low foot traffic and absence of trail signage (and sometimes the absence of trails themselves) can lead to confusion and wrong turns.
High rivers can cause the locals to establish new trails that are not on the map, and some river crossings are required without a bridge.
Having a rope and a couple of extra people around to spot you could be handy
New trails can even lead you up through mountain caves, and it is a tight squeeze with the backpack on which can cause a panic if you are claustrophobic in any way
If you are afraid of heights, you may want to reconsider as there are plenty of high cliff trails along the way
If you get hurt, there is little foot traffic to help you and no evacuation plans in place for the area (cell phones do not work until you get to Dho Tarap or Phoksundo).
Adventure Gear
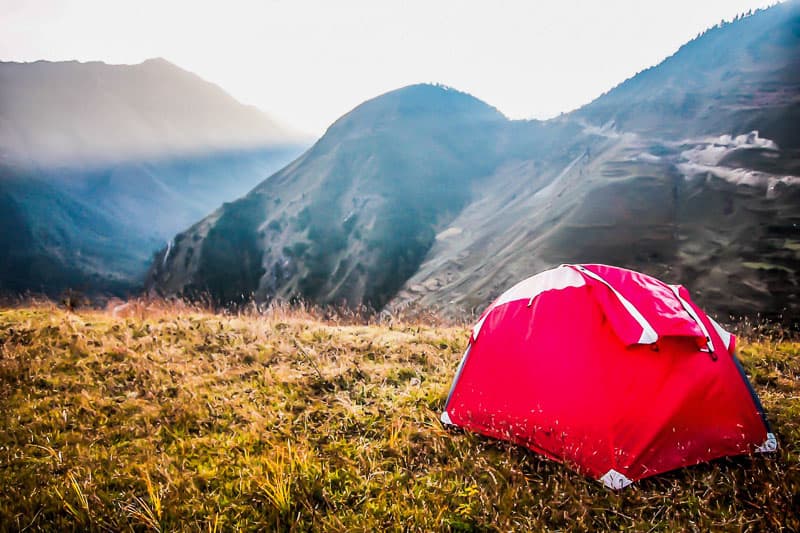
Renting a tent is 500 Rupees/ day ($4.50 USD at the time of writing) from a company such as 3 Sisters Trekking (there are plenty of other trekking companies in Pokhara). If you are interested in buying your own tent, there are very few shops that sell them in Pokhara so you may have to spend half a day popping in and out of shops to find someone who sells them – I bought mine in a small shop for 4500 ($40 USD).
It was a summer tent because that was all they had and it didn’t keep in heat well at night as a result which is not great for higher altitudes. Kathmandu has a better selection if you have it as an option or you can bring your own on your flight over which is recommended if you have the opportunity.
Other useful information.
Small stove heads cost about 800 Rupees ($7 USD), and large canisters of gas are 1000 ($9 USD) a piece or 500 ($4.50) for smaller canisters. A “200 Set” of camping stove pots and pans is 500-800 rupees. If you buy more items together such as a foam mattress (100R – $0.80), a sleeping bag liner (800R – $7 USD), stove head, gas and pots you can negotiate a better price. Beware of buying sleeping bags in Nepal.
It is not the kind of item you want to find out is a knock off, and it is hard to test without the weather to expose its authenticity. There are legitimate outdoor stores in Kathmandu where you can purchase a warm sleeping bag if you need to. If you do camp, be prepared to pay a fee of some kind to pitch your tent.
700 – our stay in Kagbeni would have been
Much better than what we paid at the guesthouse in Jomsom (1000)
Permits: paid $140 USD? For our permits – she didn’t need one because she was Nepali and they hike for free. I, however, needed one, and you are not allowed to hike Dolpo (or upper Mustang, or Manaslu, etc.) without two foreigners and one guide. I was fine paying the fee for two people as the fee was $10/week per person times the two weeks we’d be in the Dolpo region ($20) times the second person that I wasn’t trekking with but needed to pay for (40).
What I hadn’t realized the first time around was that I needed to prove a second foreigner was coming with me – they needed to supply their passport, and two passport photos and the guy in charge of the permit would take them in together and get the permit. So why did it cost $140 USD instead of just $40?
Well, the guy doing the permits got $10 which was fair for all the running around he had to do after the fact, but he also had to get a company to take us on for insurance reasons. As an independent guide, my friend could not take on the insurance coverage if anything were to happen in the region, so he contracted a company to take on the risk and insurance for us at the cost of $90.
Again totally fair but none of this is communicated to you, and we only figured all of this out by trial and error. Nolum Sunda is Yak Kharka on the map